
How to Prepare a House for Real Estate Photos
- Casey Pickard

- 2 days ago
- 6 min read
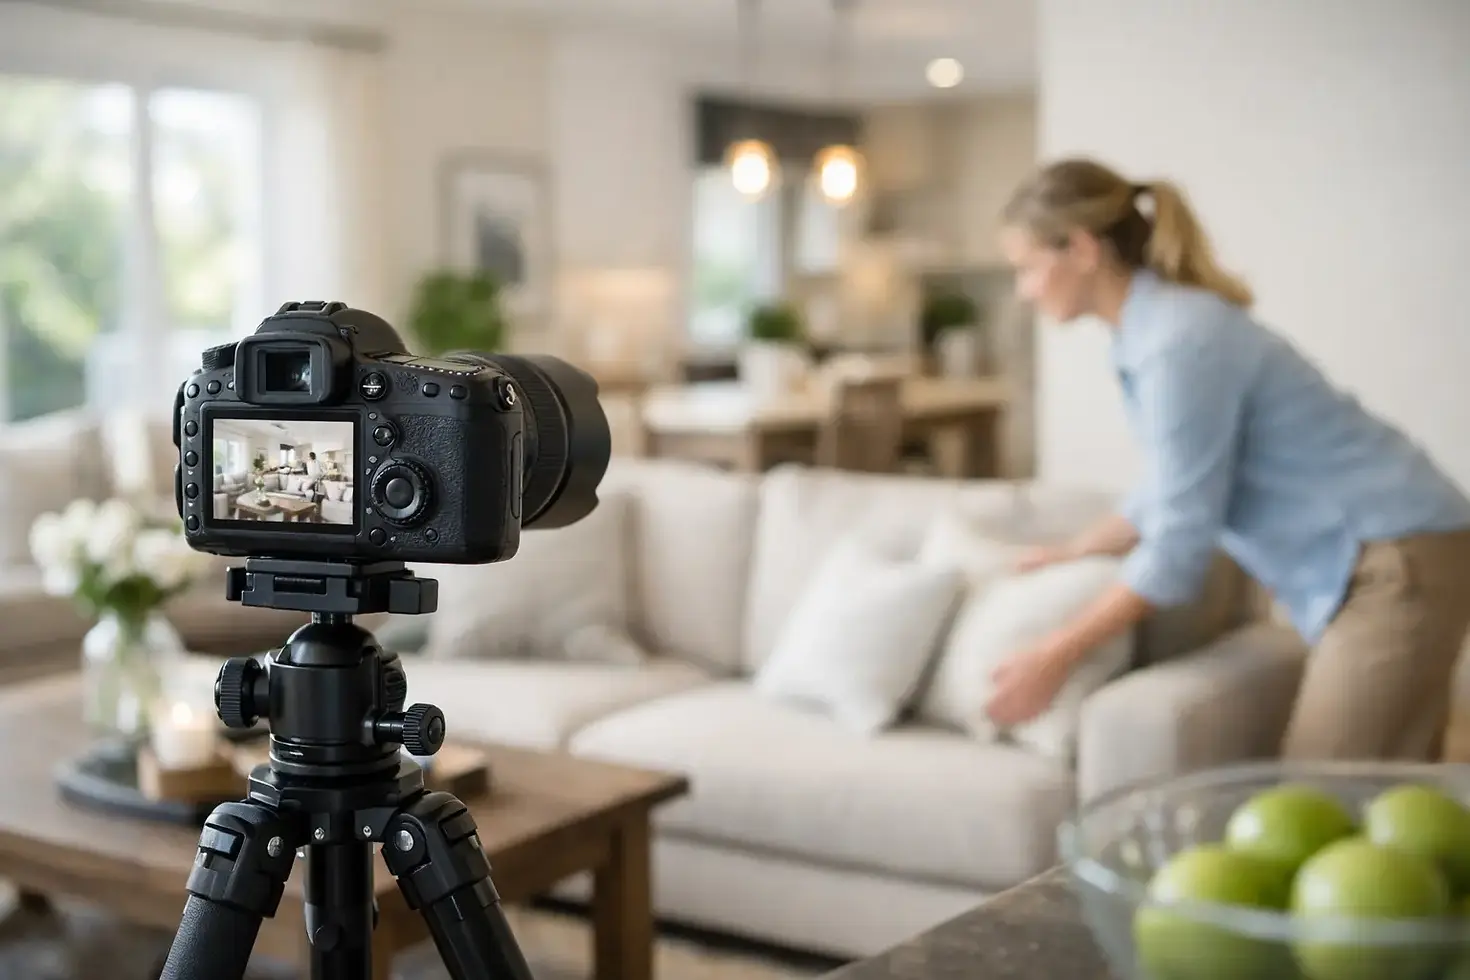
A photographer can bring out the best in a property, but the camera will always record what is actually there. A smudge on the stainless steel, a crowded countertop, a dying plant by the front door - these details pull attention away from the space and toward the distractions. If you want to know how to prepare a house for real estate photos, the goal is simple: make the home feel clean, spacious, bright, and easy for buyers to imagine as their own.
Strong listing photos do more than document a property. They shape first impressions, influence click-through rates, and set the tone for every showing that follows. In a competitive market, preparation is not cosmetic busywork. It is part of the marketing strategy.
Why photo prep has a direct impact on listing performance
Buyers make fast decisions online. Before they read the full description, before they study the price history, they look at the images and decide whether the property feels worth their time. That means every room needs to communicate value immediately.
A well-prepared home tends to photograph larger, cleaner, and more expensive. It also gives the photographer more flexibility to compose strong angles without working around clutter, cords, personal items, or visual noise. The result is a more polished set of marketing assets that supports better engagement and stronger interest.
This matters for short-term rentals and commercial spaces too. Guests and clients respond to presentation. If the images feel intentional, the property feels better managed and more desirable.
How to prepare a house for real estate photos before shoot day
The best results usually come from preparation that starts at least a day or two in advance. Trying to tidy while the photographer is arriving creates stress and often leads to missed details.
Start with decluttering. This does not mean stripping the house of all personality, but it does mean removing anything that competes with the architecture, finishes, or function of the room. Clear kitchen counters except for one or two simple decor items. Put away pet bowls, tissue boxes, remote controls, chargers, shoes, mail, and small appliances. In bathrooms, remove toothbrushes, razors, medications, and bath mats unless they are part of a very clean, intentional setup.
Then clean with the camera in mind. Floors, mirrors, glass, countertops, and stainless steel surfaces deserve extra attention because they show fingerprints, dust, and streaks quickly. Make beds tightly and evenly. Fluff pillows, straighten towels, and check corners, baseboards, and under furniture for anything visible at lens height.
If the property is occupied, reduce signs of daily life as much as possible. Family photos, refrigerator magnets, calendars, and highly specific personal decor make it harder for buyers to picture themselves in the home. Neutral, edited spaces usually perform better because they read as calmer and more premium in photos.
Focus on the rooms that matter most
Not every space carries the same weight in a listing. The exterior, kitchen, living room, primary bedroom, and primary bathroom usually do the most work in generating interest. If time is tight, prioritize these first.
That said, consistency matters. A beautifully staged kitchen loses impact if the adjacent dining area is cluttered or the bathroom down the hall looks neglected. Buyers read condition and care across the whole property. One weak room can create doubt about the rest.
Laundry rooms, mudrooms, garages, and secondary bedrooms do not need elaborate styling, but they should still look clean, organized, and functional. If a room is being marketed as an office, gym, or flex space, make that use unmistakably clear.
Getting each area camera-ready
Entry and exterior
The first photo often determines whether someone keeps scrolling. Sweep walkways, pressure wash if needed, and remove bins, hoses, toys, and extra vehicles from view. Fresh landscaping helps, but even basic cleanup goes a long way. Trim dead plants, rake gravel or mulch neatly, and make sure the front door area looks sharp.
Inside the entry, keep surfaces simple and open. A clean console table or a single plant can work well. Too many decorative pieces can make a small foyer feel crowded.
Kitchen
Kitchens sell homes, but they also collect clutter fast. Clear counters almost completely, leaving only a few attractive items if they add to the look. Hide trash cans, dish soap, drying racks, paper towels, and pet items. Remove magnets and notes from the refrigerator.
Pay attention to finishes. Stainless steel should be polished, and glossy cabinets should be wiped down. If bar stools are present, align them evenly. Straight lines read better on camera than casual everyday placement.
Living areas
Open the room visually. Remove extra side tables, oversized recliners, or anything that blocks natural pathways. Arrange pillows neatly, fold throws cleanly, and conceal visible cords. If the coffee table is crowded, scale it back.
The room should feel usable but not busy. Buyers respond to spaces that feel balanced and easy to move through.
Bedrooms
Bedrooms photograph best when they feel restful and tailored. Use simple bedding without heavy wrinkles or loud patterns. Clear nightstands except for minimal decor. Put hampers, personal items, and visible storage bins away.
In children’s rooms, complete cleanup may not always be realistic, but reducing toys and bright clutter makes a major difference. The goal is not perfection. It is visual control.
Bathrooms
Bathrooms need to look crisp. Close toilet lids, remove all personal products, and hang fresh towels neatly. Empty the shower of bottles and loofahs. Clean mirrors carefully and check chrome fixtures for water spots.
A bathroom can be small and still photograph well if it feels bright and orderly. It does not need a spa setup. It needs to look cared for.
Light, maintenance, and the details buyers notice
Great photography depends on the condition of the space as much as the camera work. Burned-out bulbs, mismatched color temperatures, loose cabinet hardware, chipped paint, and missing vent covers are easy to overlook in person and obvious in images.
Before the shoot, replace bulbs and make sure fixtures work. Use matching bulb color when possible so rooms feel consistent. Open blinds or curtains unless there is an outdoor view that needs special handling or a harsh glare issue the photographer wants to manage differently.
Minor repairs are worth doing before photos, not after. Buyers often interpret visible small defects as a sign of larger deferred maintenance. Even if that is not accurate, the impression can reduce confidence.
Occupied homes, vacant homes, and rentals require different prep
There is no single formula because the best approach depends on how the property will be marketed.
Occupied homes need editing and simplification. The challenge is removing enough personal presence to broaden appeal without making the home feel sterile. In many cases, a selective pre-shoot reset is enough.
Vacant homes are cleaner from a clutter standpoint, but they can photograph cold and smaller if completely empty. Depending on the property and price point, physical staging or realistic virtual staging may make more sense. The trade-off is budget versus impact. Empty rooms show square footage clearly, but furnished rooms often help buyers understand scale and use.
For short-term rentals, preparation should emphasize guest experience. Make the beds hotel-clean, set outdoor seating neatly, stage amenities that support bookings, and remove owner storage or maintenance items from sight. Rental photography should sell the stay, not just the floor plan.
What to avoid on photo day
One of the biggest mistakes is leaving too much to fix once the photographer arrives. Professional photographers can make small adjustments, but extensive cleanup on-site cuts into shooting time and can limit the final result.
Avoid overdecorating as well. Too many plants, trays, pillows, or countertop accessories can make a home feel smaller. Premium presentation is usually more restrained than people expect.
If people or pets will be in the home during the shoot, plan for where they will go. Movement, noise, and open doors can slow the session and affect consistency. The smoother the environment, the more efficiently the property can be captured.
A practical standard for better photos
If you are wondering whether a room is ready, use a simple test: would a buyer understand the room’s purpose, notice the best features first, and feel like the space is well maintained? If the answer is yes, you are close.
For agents, hosts, and property marketers, this preparation is not just about making things look nice for an hour. It is about building stronger visual assets that help the property compete from the first click. Pickard Photography sees it every day - the homes that are prepared with intention almost always present better, attract better attention, and support better results.
A little discipline before the shoot often pays for itself in the quality of the listing long after the photos are delivered.


Comments